
Let’s be honest for a second. We’ve all had those evenings where you walk into the kitchen after a long, exhausting day, stare blankly into the pantry, and wonder how on earth you’re going to pull together a dinner that feels warm, cozy, and comforting without spending hours fussing over complicated steps.
I’ve had plenty of those nights. For a long time, ground beef patties felt like a boring weeknight fallback—just something you slap on a bun when you’re too tired to cook.
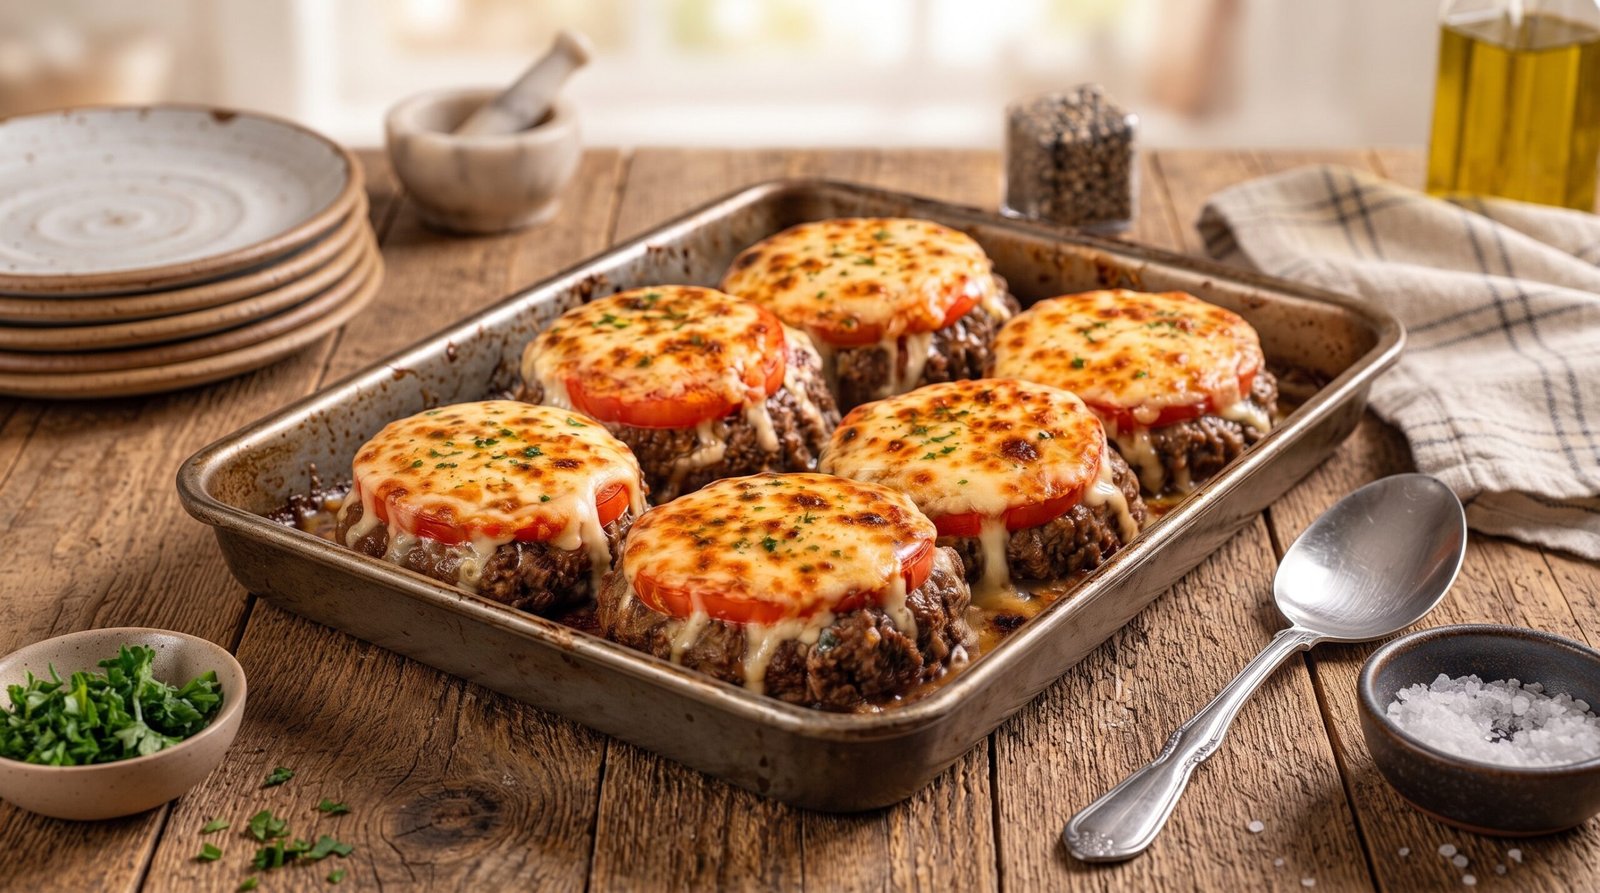
That was until I completely revamped how I make them. I decided to bake individual seasoned beef patties in a roasting pan, layer each one with a fresh slice of ripe tomato, blanket them in a thick layer of melting mozzarella cheese, and bake them until the tops turned a deep, caramelized golden brown. When I pulled that metal baking pan out of the oven and saw those bubbling, cheese-draped patties resting in rich pan juices—just like the one you see here—I knew I had elevated ground beef into something truly extraordinary. If you want a dinner that makes everyone at your table ask for seconds, you are in the exact right place.
Why These Cheesy Tomato Beef Patties Deserve a Permanent Spot in Your Rotation
What makes this dish so special isn’t fancy culinary technique—it’s pure, unadulterated comfort food upgraded for maximum flavor and moisture.
Unlike standard dry burgers, these patties bake in a rich pan sauce that keeps every single bite tender and juicy. Topped with a slice of fresh tomato and a golden, bubbling layer of cheese, it transforms a humble ground beef dinner into an Italian-inspired bistro classic. It’s budget-friendly, feeds a hungry family easily, and requires zero complicated shaping or frying.
Getting Your Kitchen Ready: Tools of the Trade
You don’t need any high-tech kitchen gadgets to pull this off, but having the right basic tools makes the process go smoothly:
- A reliable metal roasting pan or baking sheet (like the sturdy metal pan sitting on the wooden tabletop in our reference photo).
- A heavy-duty mixing bowl to combine the meatloaf mixture thoroughly.
- A serving spoon for scooping up those rich pan juices.
Ingredients You’ll Need
Before you turn on the stove, get everything measured and organized. Here is the exact lineup for this comforting bake.
| Ingredient | Amount | Notes |
| Ground Beef | 2 lbs | Lean ground beef (85/15) is ideal for rich, juicy patties. |
| Breadcrumbs | 1/2 cup | Panko or Italian breadcrumbs to bind the meat mixture together. |
| Milk | 1/4 cup | Adds moisture so the patties stay tender. |
| Egg | 1 large | Acts as the binder to hold the patty shapes. |
| Garlic & Onion | 3 cloves & 1 small | Minced finely for deep, savory flavor. |
| Fresh Tomatoes | 3 large | Ripe tomatoes, sliced into thick rounds to top each patty. |
| Mozzarella Cheese | 2 cups | Freshly shredded or sliced for that golden, bubbling top crust. |
| Seasonings | to taste | Salt, black pepper, Worcestershire sauce, and Italian herbs. |
| Fresh Parsley | for garnish | Finely chopped for a vibrant pop of color. |
Let’s Get Cooking: Step-by-Step
Step 1: Mix the Beef Patty Base
Preheat your oven to 375°F (190°C) so it’s hot and ready by the time your prep work is done.
In a large mixing bowl, combine your ground beef, breadcrumbs, milk, egg, minced garlic, diced onion, a splash of Worcestershire sauce, salt, black pepper, and Italian herbs. Using your clean hands, gently mix everything together until just combined. Be careful not to over-mix, or the beef can become dense and tough.
Step 2: Shape and Arrange in the Pan
Divide the meat mixture into equal portions and shape them into thick, uniform round patties.
Arrange the patties neatly across your metal roasting pan, leaving a little space between each one so they roast evenly and develop a great savory crust.
Step 3: Add the Tomato Slices
Slice your fresh tomatoes into thick rounds, making sure you have one nice slice to place directly on top of each beef patty. Press the tomato slice down gently so it sits securely on the meat.
Step 4: Initial Bake
Pop the roasting pan into your preheated oven and bake for about 25 to 30 minutes, allowing the beef patties to cook through and release their savory juices into the bottom of the pan.
Step 5: The Cheese Blanket and Final Melt
Take the pan out of the oven. Scatter your freshly shredded mozzarella cheese heavily across the top of each tomato-topped patty, letting it drape down the sides over the beef.
Return the pan to the oven for another 10 to 12 minutes, until the cheese has melted completely, turned a deep golden-brown, and developed those gorgeous bubbling spots you see in the reference photo.
Step 6: Garnish and Serve
Pull the roasting pan out of the oven and let it rest on the counter for about 5 minutes. This resting window allows the juices inside the beef to settle.
Sprinkle a generous amount of freshly chopped parsley all over the top for a bright pop of green color. Grab your serving spoon to ladle those rich pan juices right over the plates, and serve warm!
Practical Tips from My Kitchen to Yours
- Don’t Over-mix: When combining your beef mixture, mix just until incorporated. Over-working the ground beef results in a dense texture rather than a tender, melt-in-your-mouth bite.
- Shred Your Own Cheese: Pre-bagged shredded cheese contains anti-caking agents that prevent smooth melting. Grating a block of mozzarella yourself ensures a silky, stretchy cheese crust.
- Choose Firm Tomatoes: Pick ripe but firm tomatoes so they hold their shape during roasting without making the patties soggy.
Serving Suggestions
Because these cheesy tomato beef patties are rich, savory, and swimming in delicious pan sauce, they pair wonderfully with classic comfort food sides:
- Garlic Mashed Potatoes: An absolute must-have for soaking up every drop of that savory beef pan sauce.
- Roasted Asparagus or Green Beans: A vibrant green veggie side adds a fresh, contrasting crunch to balance out the rich meal.
- Crusty French Bread: Perfect for mopping up any extra juices left in your roasting pan.
Storage and Reheating
If you happen to have leftovers, let the dish cool completely, then store portions in airtight containers along with some of the pan juices. It will keep happily in the refrigerator for up to 3 to 4 days.
To reheat, individual portions can be microwaved for 1–2 minutes, or warmed in a toaster oven at 350°F (175°C) until hot through the center.
Common Mistakes to Avoid
- Adding Cheese Too Early: If you put the cheese on at the very beginning of the baking process, it will burn long before the center of the thick beef patties is cooked. Add it during the final 10 minutes!
- Skipping the Resting Time: Cutting into the patties straight out of the oven will cause the melted cheese and juices to slide off. Give it time to set.
- Skimping on Seasoning: Ground beef absorbs a lot of salt and flavor, so make sure your meat mixture is well-seasoned before shaping.
Frequently Asked Questions (FAQs)
Can I make these patties ahead of time?
Yes, absolutely! You can shape the unbaked patties in your roasting pan, top with tomatoes, cover tightly, and keep them in the fridge for up to 24 hours before baking. Just add about 5 extra minutes to the initial bake time.
Can I use ground turkey instead of ground beef?
Yes, lean ground turkey or ground chicken works wonderfully as a direct substitute, though you may want to add a tablespoon of olive oil or milk to keep the leaner meat from drying out.
What if I don’t have mozzarella cheese?
Provolone, Monterey Jack, or even mild cheddar work great as substitutes if you want to switch up the cheese flavor profile.
Final Thoughts
At the end of the day, comfort food doesn’t need to be complicated. By taking simple ground beef and giving it an upgrade with fresh tomatoes and melted cheese, you can turn an ordinary weeknight into something special.
These cheesy tomato-topped beef patties prove that crowd-pleasing meals are easy to achieve right at home. Give them a try the next time you need a cozy dinner win, and watch how fast they disappear from the pan. Happy cooking!