
Let’s be completely honest for a second. We’ve all felt that overwhelming sense of intimidation when it comes to cooking a beef brisket. For the longest time, I thought you needed a massive, expensive backyard smoker, a six-hour training course in wood management, and to wake up at 4:00 AM just to get decent results.
I still remember my first backyard brisket attempt. I threw a huge cut of meat on a hot grill, guessed at the temperature, and ended up with a slab of beef so tough and dry that we literally had to use a serrated steak knife just to hack through it. It was an expensive, heartbreaking disaster.
I realized that if you want that incredible, fall-apart tender texture and rich, sticky barbecue glaze without spending your entire weekend hovering over a smoking pit, your oven is actually your best friend.
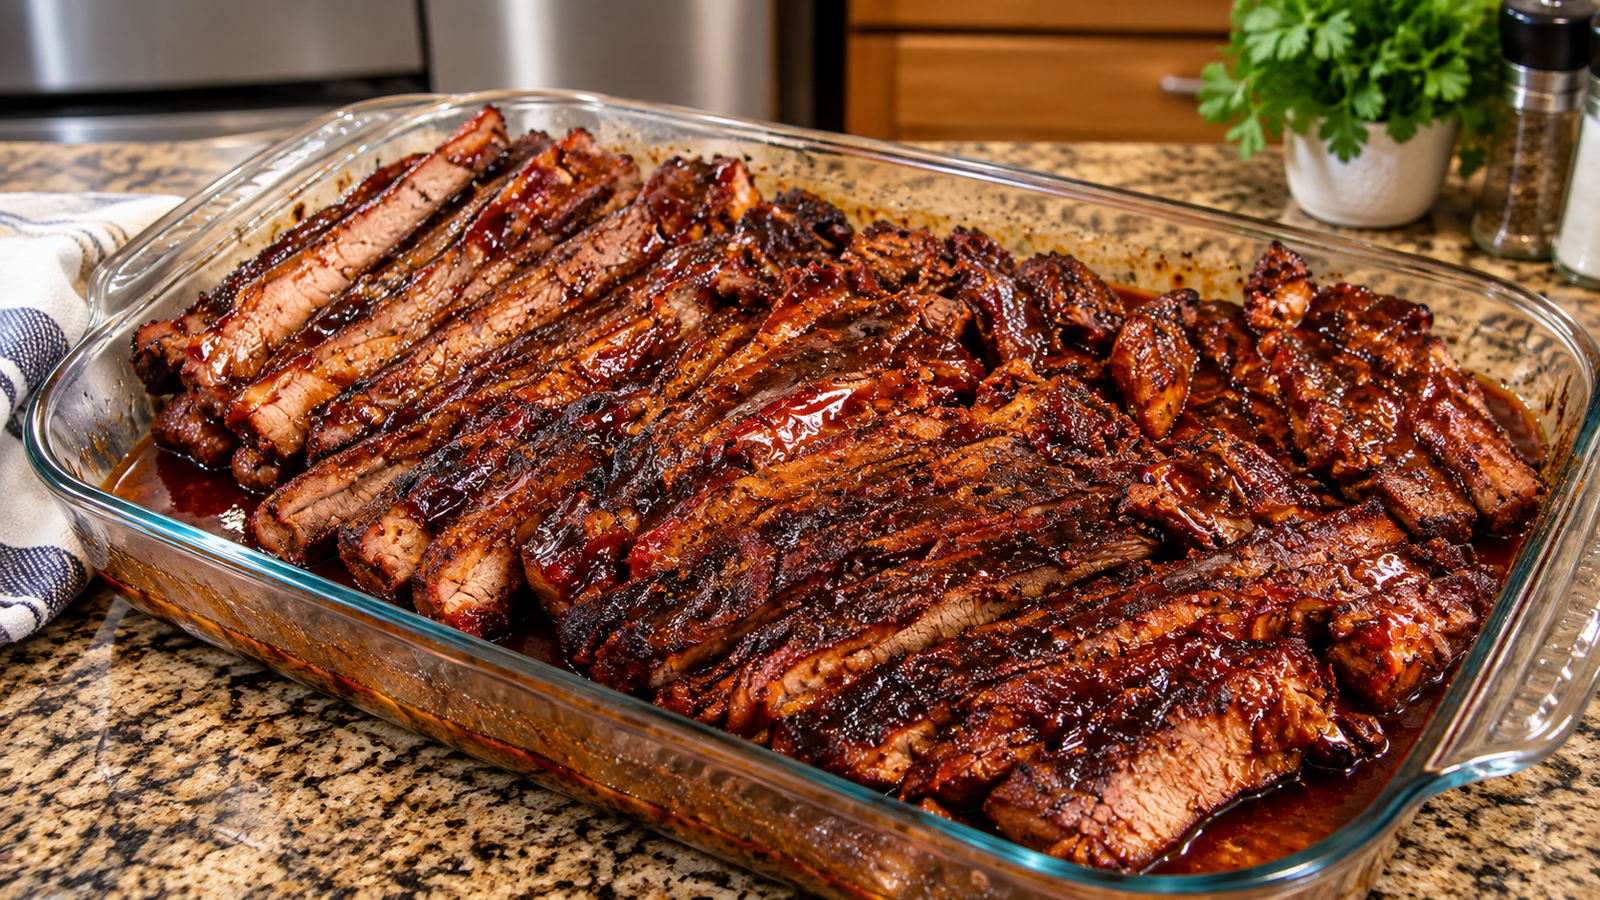
Once I figured out the secret of a slow oven braise followed by a high-heat glaze, my weekend dinners completely changed. Take one look at the file named image_d06c9e.jpg, and you can see exactly what success looks like. Look at those neat, even slices of beef brisket laid out in a clear glass baking dish, completely drenched in a glistening, thick mahogany barbecue sauce. You can see the rich juices pooling around the meat, and the tender grain of the beef falling apart with just a touch.
If you want to pull off an epic, crowd-pleasing barbecue dinner right from your standard kitchen oven, you are in the exact right place. Let’s break down how to make this happen.
Why Oven-Baking Brisket is a Total Game-Changer
What makes a brisket so tricky is that it comes from the chest of the cow—a heavily exercised muscle packed with tough connective tissue called collagen. If you cook it too fast, it tightens up and turns into shoe leather.
When you cook it low and slow in a covered baking dish with a flavorful liquid, that tough collagen slowly melts into gelatin. This is the magic transformation that gives brisket its legendary melt-in-your-mouth texture. By finishing it uncovered with your favorite barbecue sauce at the end, the sugars caramelize into that sticky, glossy crust you see in the photos. It is foolproof, requires zero babysitting, and delivers authentic barbecue flavor right out of your home oven.
Getting Your Kitchen Ready: Tools of the Trade
You don’t need a fancy smoker, but having the right basic kitchen tools will make the process completely stress-free:
- A Heavy Roasting Pan or 9×13 Baking Dish: Large enough to hold your brisket flat.
- Heavy-Duty Aluminum Foil: Absolutely mandatory for sealing the pan tightly during the long bake to trap all the moisture.
- A Sharp Carving Knife: Essential for slicing the meat against the grain so every bite is tender.
- A Digital Meat Thermometer: To check when the brisket has reached that magic tenderness zone.
The Ingredient Lineup
Before you preheat your oven, get everything measured and organized. Here is the exact lineup for this incredible oven brisket.
| Ingredient | Amount | Notes |
| Beef Brisket | 4 to 5 lbs | A flat cut works wonderfully for even slicing in a baking dish. |
| Brown Sugar | 1/3 cup | Packed firmly, to help build the sweet crust. |
| Smoked Paprika & Garlic Powder | 1 tbsp each | Delivers that classic outdoor smoke flavor without a grill. |
| Worcestershire Sauce | 2 tbsp | Adds deep umami savory notes to the meat. |
| Beef Broth | 1 cup | Creates the braising liquid to keep the meat juicy. |
| Liquid Smoke | 1 tsp | The secret weapon for giving oven-baked brisket that authentic smoky aroma. |
| Barbecue Sauce | 1.5 cups | Your favorite thick, sweet-and-tangy BBQ sauce for the final glaze. |
| Seasonings | to taste | Kosher salt, freshly cracked black pepper, and onion powder. |
Let’s Get Cooking: Step-by-Step
Step 1: Trim and Season the Brisket
Take your brisket out of the fridge and pat it completely dry with paper towels. If there is a thick cap of hard fat on top, trim it down to about 1/4-inch thick so your seasonings can actually penetrate the meat.
In a small bowl, mix your brown sugar, smoked paprika, garlic powder, onion powder, salt, and black pepper. Rub this spice blend aggressively all over every single side of the brisket until it is fully coated.
Step 2: The Braising Bath
Preheat your oven to 325°F (160°C).
Place your seasoned brisket flat inside your roasting pan or baking dish. In a separate measuring cup, whisk together your beef broth, Worcestershire sauce, and liquid smoke. Pour this liquid carefully down the side of the pan—try not to wash the dry rub right off the top of the meat!
Step 3: Seal and Bake Low and Slow
Tear off two large sheets of heavy-duty aluminum foil and cover your baking dish completely. Crimp the edges tightly around the rim of the dish to create an airtight seal. You cannot let steam escape, or your brisket will dry out.
Place the covered pan into your preheated oven and bake for 3.5 to 4 hours. You want the meat to reach an internal temperature of around 200°F (93°C), where a fork slides in with zero resistance.
Step 4: The Barbecue Glaze Finish
Carefully pull the pan out of the oven and peel back the foil (watch out for the hot steam!).
Drain off excess liquid if the pan is flooded, leaving just a little juice at the bottom. Generously brush your favorite thick barbecue sauce all over the top and sides of the tender brisket. Leave the dish uncovered and return it to the oven for 15 to 20 minutes, just until the sauce bubbles, thickens, and caramelizes into a glossy crust.
Step 5: The Mandatory Rest and Slice
Take the brisket out of the oven and let it rest, loosely covered with foil, for 15 to 20 minutes. This lets the juices settle back into the meat fibers.
Transfer the brisket to a cutting board. Locate the direction of the grain (the way the muscle fibers run) and slice the meat against the grain into neat, clean portions. Drizzle any remaining pan juices over the slices, and serve immediately!
Practical Tips from My Kitchen to Yours
- Always Slice Against the Grain: Look closely at the muscle lines on your brisket. Slicing perpendicular to those lines shortens the muscle fibers, making every bite infinitely more tender to chew.
- Don’t Skimp on the Foil Seal: A tight aluminum foil seal is the single most important factor in keeping your brisket moist during its long oven braise.
- Use Liquid Smoke Wisely: A single teaspoon goes a long way in giving your oven-baked meat that authentic outdoor barbecue flavor without overpowering it.
Serving Suggestions
Because oven-baked barbecue brisket is rich, savory, and heavily sauced, it pairs best with classic comfort food sides that balance out the meal:
- Creamy Southern Coleslaw: The cool, crisp crunch and tangy acidity provide a brilliant contrast to the warm, rich beef.
- Buttery Cornbread: Perfect for soaking up extra barbecue sauce right off your plate.
- Classic Macaroni and Cheese: An absolute crowd-pleaser that completes any barbecue spread.
Storage and Reheating
Store any leftover sliced brisket in an airtight container, submerged in its own pan juices or extra barbecue sauce so it doesn’t dry out. It will keep happily in the refrigerator for up to 4 days.
To reheat without ruining the texture, place the slices in an oven-safe dish with a splash of beef broth or water, cover tightly with foil, and warm at 325°F (160°C) for about 15 minutes until heated through.
Common Mistakes to Avoid
- Skipping the Rest Time: Slicing into a hot brisket immediately causes all the precious internal juices to run out onto the board, leaving the meat dry. Let it rest!
- Cooking at Too High of a Temperature: Brisket demands low and slow heat to break down its tough connective tissue. Rushing it in a hot oven will only result in tough beef.
- Forgetting Liquid Smoke: If you want that traditional backyard barbecue flavor in an indoor oven, liquid smoke is your secret weapon. Don’t leave it out!
Frequently Asked Questions (FAQs)
Can I make this brisket ahead of time?
Yes! You can bake and slice the brisket a day in advance. Store it in its juices in the fridge, then reheat gently covered in foil with extra BBQ sauce before serving.
What is the best cut of brisket to buy?
A flat cut is uniform in thickness and slices into gorgeous, neat portions for a dinner party, while a point cut is fattier and great for shredding.
Can I use dry rub instead of wet sauce?
While you can make a dry-rub-only brisket, adding that thick layer of barbecue sauce at the end creates the glossy, sticky glaze that makes this dish shine.
Final Thoughts
Mastering a tender, flavorful barbecue brisket doesn’t require waking up before dawn or buying expensive outdoor equipment. By trusting your kitchen oven, sealing in your braising liquid, and finishing with a sticky barbecue glaze, you can pull off a centerpiece meal that looks and tastes like it came straight from a smokehouse.
Give this oven-baked brisket a try for your next weekend gathering or family dinner, and watch how fast it disappears from the table. Happy cooking!