Let’s be completely honest for a moment. We’ve all had those chilly autumn evenings where you finish a cozy dinner, crave something sweet and warm to wrap up the night, but realize you have zero energy left to stand over a hot stove baking a complicated, multi-layer pie.
I’ve hit that exact wall more times than I can count. For a long time, satisfying a craving for apple dessert meant committing to peeling a mountain of fruit and wrestling with pie crusts.
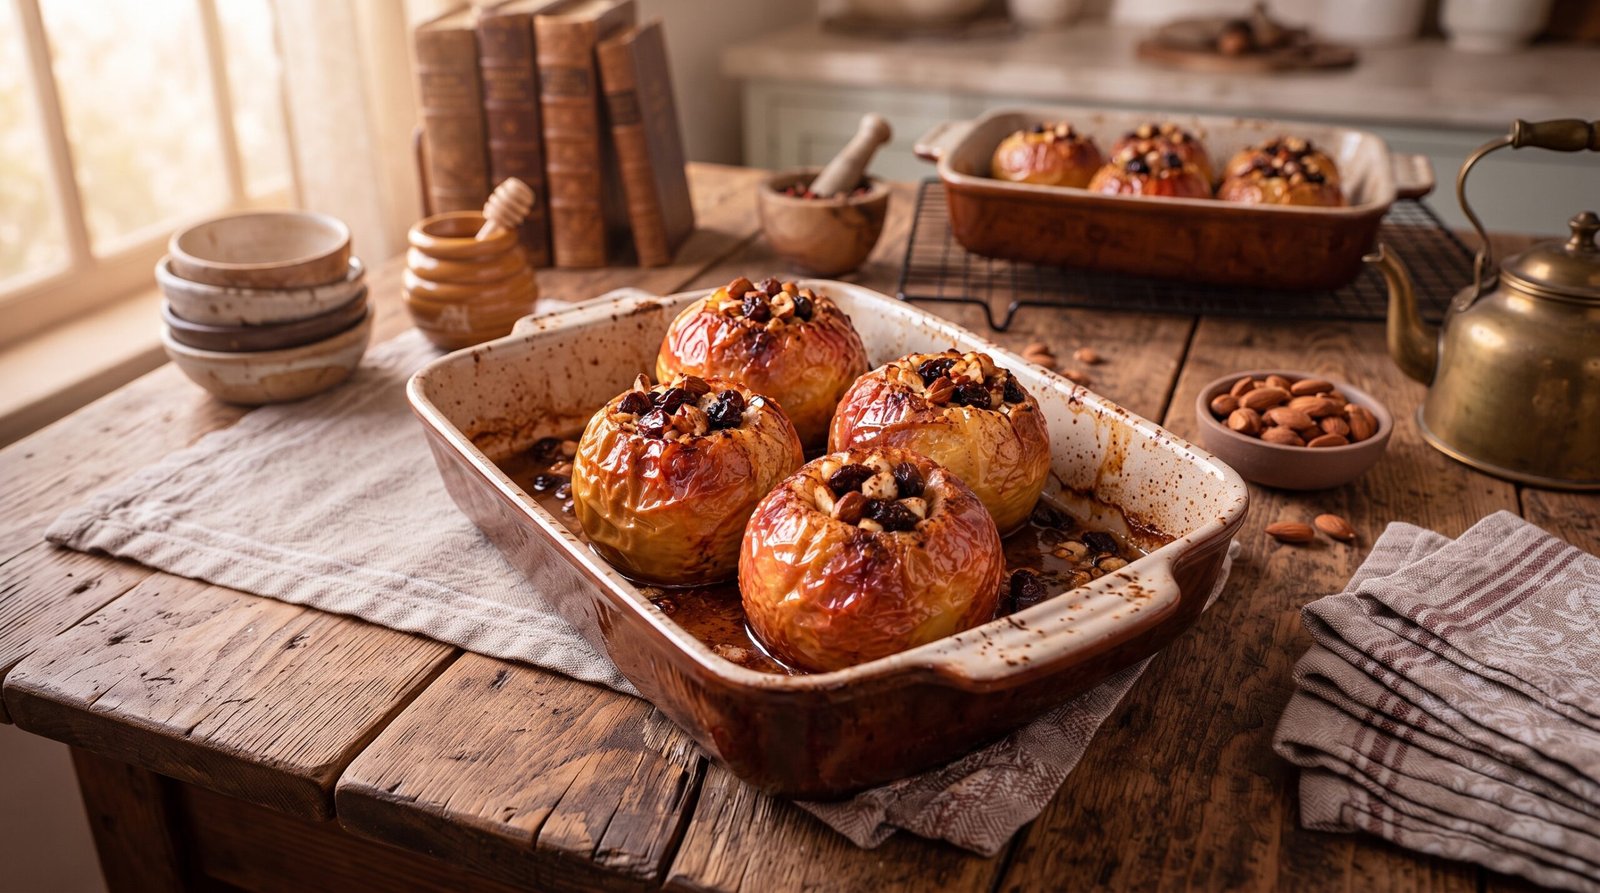
That was until I rediscovered the absolute rustic magic of baked stuffed apples. I cored some fresh Honeycrisp apples, packed their centers with a rich mix of brown sugar, butter, chopped nuts, and dried fruit, popped them into a baking dish, and let the oven work its magic. When I finally pulled that ceramic pan out of the oven and lifted the spoon to reveal tender, wrinkled skins glistening with cinnamon syrup and crowned with toasted nuts and raisins right there in the dish—just like the ones you see here—I knew my dessert routine was forever changed.
Why These Baked Stuffed Apples Deserve a Permanent Spot in Your Recipe Box
What makes these cinnamon baked stuffed apples so genius isn’t fancy culinary technique—it’s pure, unadulterated comfort paired with incredible rustic flavor.
Unlike traditional pies that take hours, this recipe lets the oven do the heavy lifting with minimal prep work. The apples soften to fork-tender perfection while the butter, brown sugar, and spices melt together into a bubbling, syrupy glaze that pools in the bottom of the dish. Plus, it fills your entire home with an unbelievable aroma of cinnamon and warm fruit that makes any evening feel like a special occasion.
Getting Your Kitchen Ready: Tools of the Trade
You don’t need any high-tech kitchen gadgets to pull this off. Keeping things simple is the secret to a stress-free treat:
- A reliable ceramic or stoneware baking dish (like the rustic brown baking pan sitting on the wooden tabletop in our reference photo).
- A small paring knife or a dedicated apple corer to remove the core cleanly without piercing the bottom.
- A small mixing bowl to combine your nut and fruit filling.
Ingredients You’ll Need
Before you start preheating your oven, get everything measured and organized. Here is the exact lineup for this comforting autumn dessert.
| Ingredient | Amount | Notes |
| Apples | 4 large | Firm baking apples like Honeycrisp, Granny Smith, or Braeburn work best. |
| Brown Sugar | 1/3 cup | Packed tightly; helps build that sweet, caramelized filling. |
| Butter | 4 tbsp | Cut into small cubes to stuff inside each apple. |
| Chopped Nuts | 1/4 cup | Pecans or walnuts (like the chopped nuts seen in our photo) for a wonderful crunch. |
| Raisins or Dried Cranberries | 2 tbsp | Adds a sweet, chewy texture to the center. |
| Ground Cinnamon | 1 tsp | The quintessential warm spice for baked fruit. |
| Water or Apple Cider | 1/4 cup | Poured into the bottom of the dish to create steam and prevent sticking. |
Let’s Get Cooking: Step-by-Step
Step 1: Core the Apples
Preheat your oven to 375°F (190°C) so it’s hot and ready by the time your prep work is done.
Wash your apples thoroughly and pat them dry. Using a paring knife or an apple corer, carefully cut out the core from the top of each apple down toward the bottom, making sure not to cut all the way through the base. You want to create a little cup or well that will hold your delicious filling securely.
Step 2: Mix the Filling
In a small mixing bowl, combine your brown sugar, ground cinnamon, chopped pecans or walnuts, and raisins or dried cranberries. Toss them together until the dry spices coat the nuts and fruit evenly.
Step 3: Stuff the Apples
Place your cored apples snugly into your ceramic baking dish.
Spoon your brown sugar and nut mixture tightly into the cavity of each apple, pressing it down gently. Drop a small cube of butter right on top of the filling in each apple; as it bakes, the melting butter will seep down through the center, enriching the fruit.
Step 4: Add Liquid and Bake
Pour your water or apple cider into the bottom of the baking dish around the base of the apples. This liquid creates steam, keeping the apples moist and preventing the sugar syrup from burning.
Pop the baking dish into your preheated oven and bake for 35 to 45 minutes. You’ll know they are ready when the skins are slightly wrinkled and a fork slides effortlessly through the flesh of the apple.
Step 5: Baste and Serve
Pull the baking dish out of the oven and let it rest for 5 minutes.
Spoon some of the warm, syrupy juices from the bottom of the pan right back over the top of the baked apples to give them a gorgeous, glossy shine. Serve warm straight from the dish!
Practical Tips from My Kitchen to Yours
- Choose the Right Apple: Firm baking apples like Honeycrisp or Granny Smith hold their shape wonderfully in the oven without collapsing into mush.
- Don’t Pierce the Bottom: When coring your apples, be careful not to poke through the bottom skin, or all your melted butter and sugar syrup will leak out into the pan instead of staying inside the fruit.
- Bake and Baste: Basting the apples with the pan juices halfway through baking or right when they come out ensures they stay incredibly moist and flavorful.
Serving Suggestions
Because these baked stuffed apples are rich, sweet, and comforting, they pair wonderfully with cool, creamy additions to balance out the warm spices:
- A Scoop of Vanilla Ice Cream: The ultimate pairing! A melting scoop of cold vanilla bean ice cream over warm baked apples creates an incredible temperature contrast.
- A Dollop of Whipped Cream: A light, fluffy cloud of whipped cream adds a wonderful lightness to the dessert.
- A Drizzle of Caramel Sauce: For an extra decadent treat, drizzle a little warm caramel sauce over the toasted nuts before serving.
Storage and Reheating
If you happen to have leftovers, let the apples cool completely, then store them in an airtight container in the refrigerator for up to 3 days.
To reheat, place an apple in a microwave-safe bowl and heat for 45 to 60 minutes until warm through the center. You can also warm them gently in a 325°F (160°C) oven for about 10 minutes.
Common Mistakes to Avoid
- Using Soft Eating Apples: Soft varieties like McIntosh break down and turn to mush almost immediately in the oven. Stick to crisp baking apples!
- Skipping the Water in the Pan: Pouring a splash of water or cider into the bottom of the dish is essential to create steam and prevent the sugar from scorching.
- Over-baking: Keep an eye on your timer so the apples soften to fork-tender perfection without completely collapsing on the plate.
Frequently Asked Questions (FAQs)
Can I use maple syrup instead of brown sugar?
Yes, absolutely! Drizzling a tablespoon of pure maple syrup into each apple center along with the cinnamon and nuts makes a fantastic alternative sweetener.
Can I make these ahead of time?
You can core and stuff the apples earlier in the day, cover the baking dish, and keep them in the fridge until you’re ready to preheat the oven and bake. Just add 5 extra minutes to the baking time!
What if I have a nut allergy?
You can easily omit the pecans or walnuts and substitute rolled oats mixed with a little extra brown sugar and butter for a delicious, nut-free crisp topping.
Final Thoughts
At the end of the day, comfort food doesn’t need to be complicated or take hours to prepare. Sometimes, the most rewarding desserts are the simplest ones—built from everyday ingredients that fill your home with an incredible aroma and bring everyone running to the kitchen table.
These cinnamon baked stuffed apples deliver all the cozy, sweet flavors of fall in a rustic, beautiful presentation. Give them a try the next time you need a simple, satisfying dessert win, and watch how fast they disappear from the pan. Happy cooking!